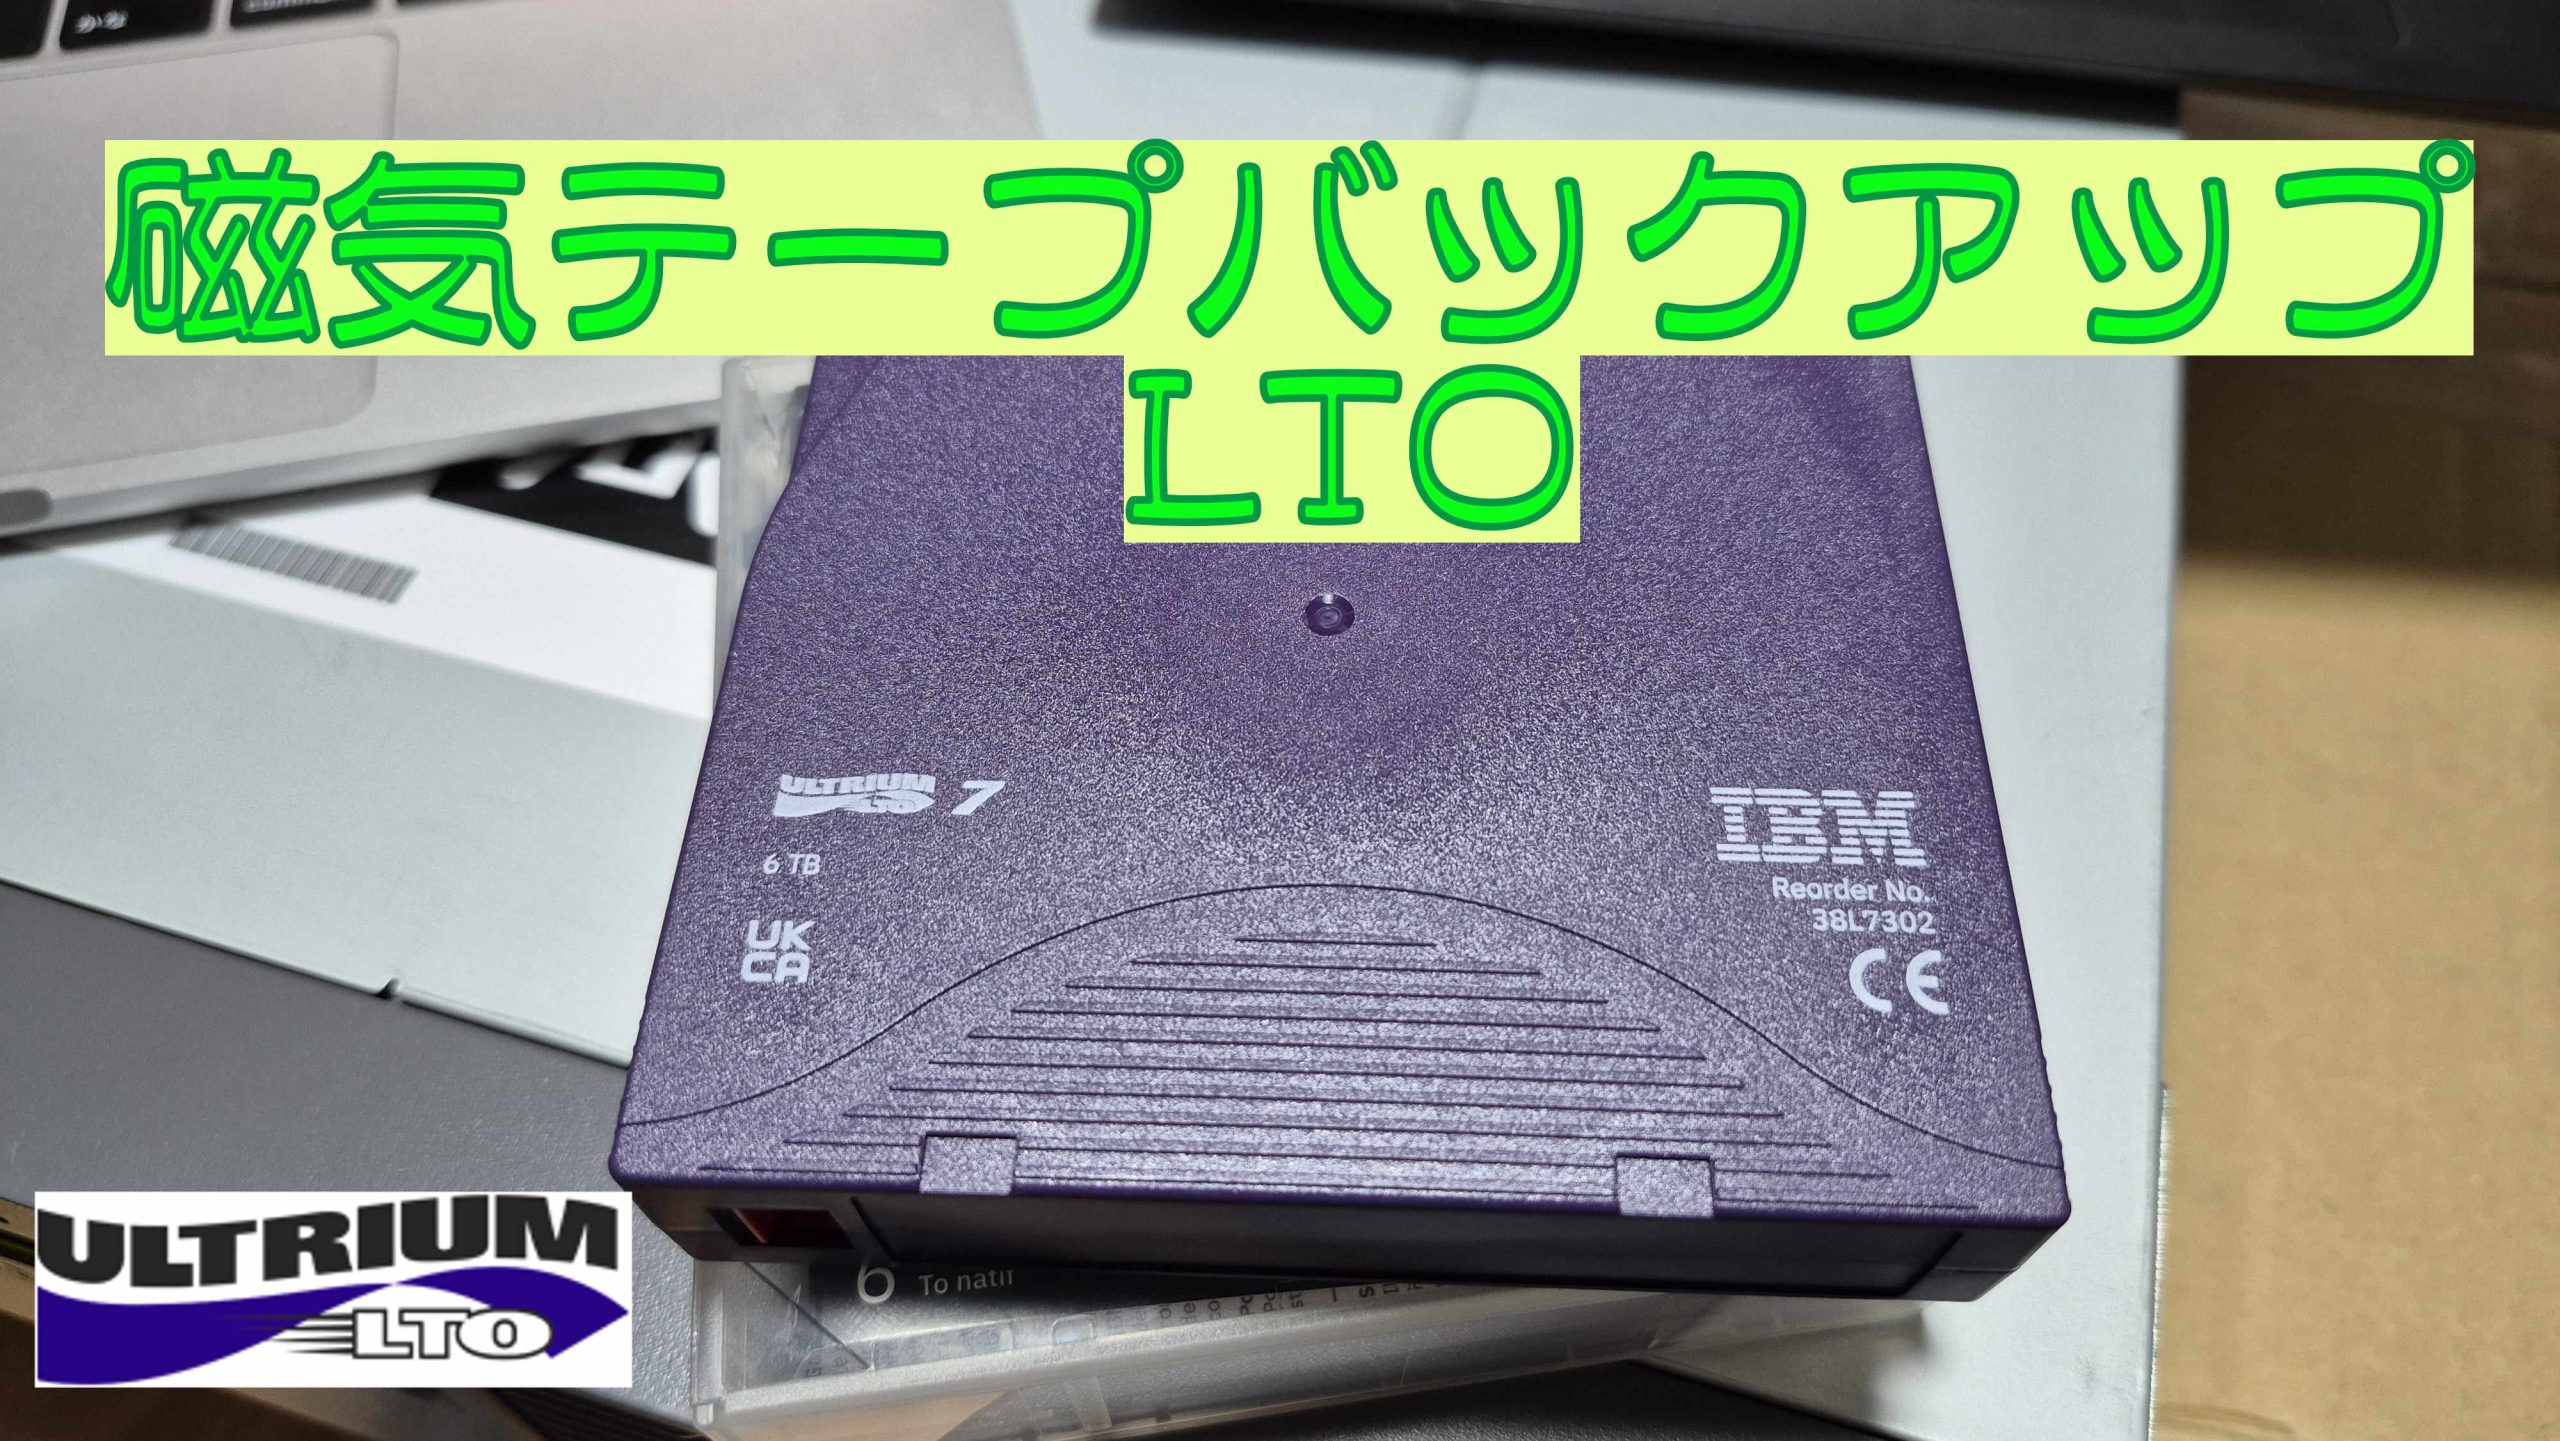
夢の磁気テープ
LTOとは?
Liner Tape-Openの略でコンピュータ用磁気テープのオープン規格です。
大容量、低コストが強みで、バックアップなど大量のデータ保管に向きます。
だいぶ前になりますがLTO7のドライブを買うことができたのでバックアップするまでのメモになります。

LTOを扱うのに必要な物
光学メディア(CD,とかDVDとかBD)などを使う時にドライブが必要なように、LTOにもドライブと扱うマシンが必要になります。(え、光学メディア側から無い?ググッテネ)
上記URLにある用に以前購入したのはドライブとテープライブラリです。
LTO(メディア)

磁気テープというように磁気材質がテープ状になっています。
世代が決められており大体2倍ずつ増えています。
また内部的にどのような世代なのかの情報をRFIDで記録しています(画像中央の小さい方の黒いヤツ)
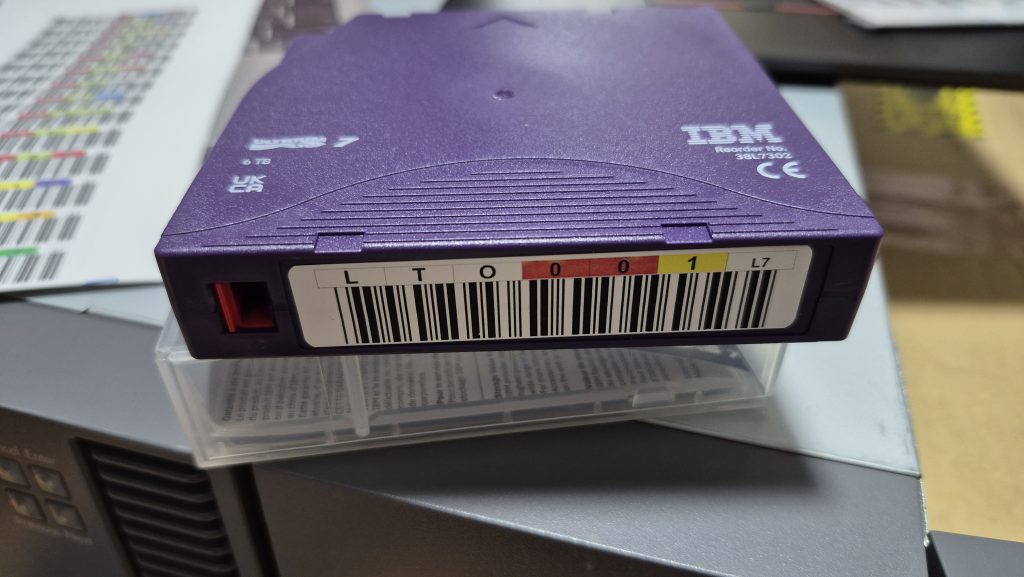
画像のようにテープ手前の側面にバーコードのシールを貼り、後述のテープライブラリ等で管理できます。
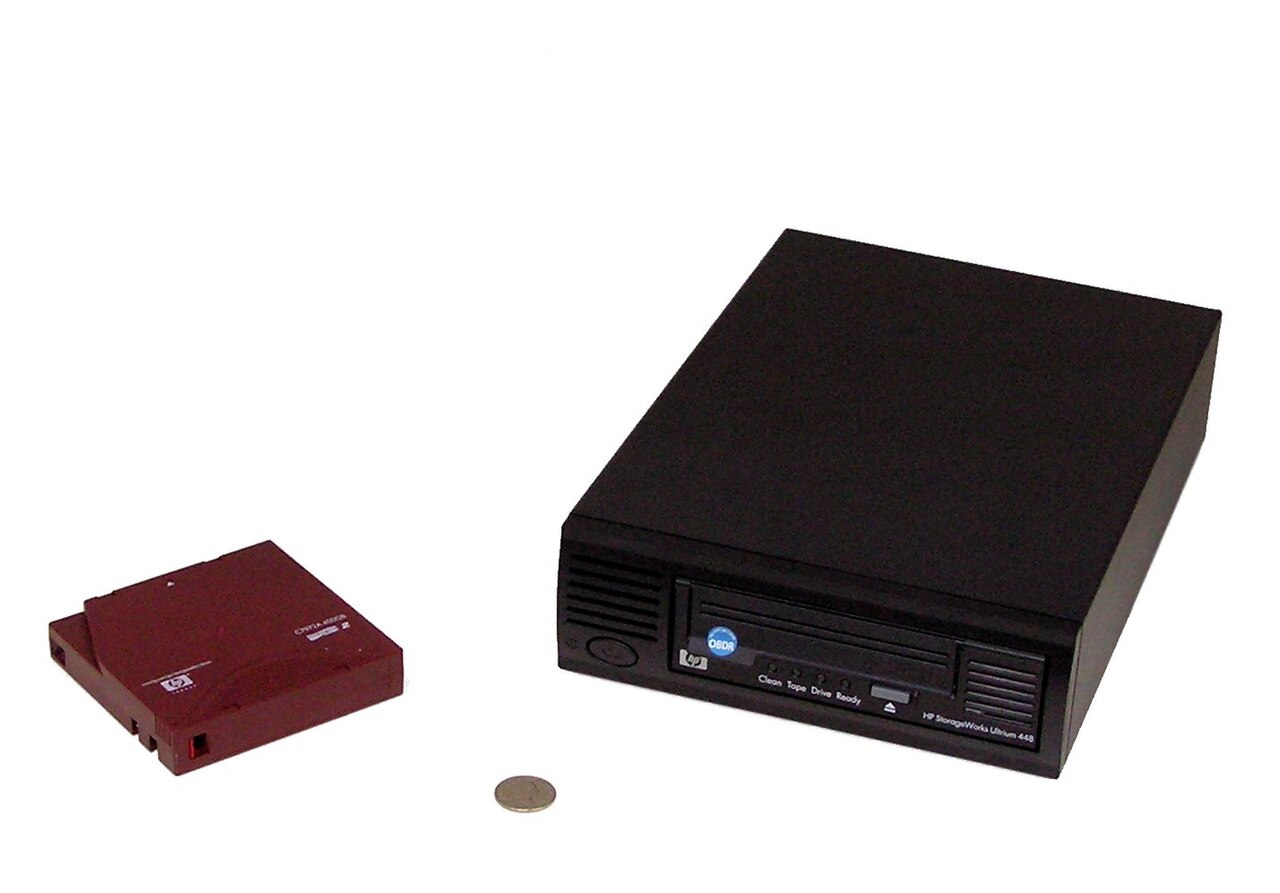
LTOドライブ
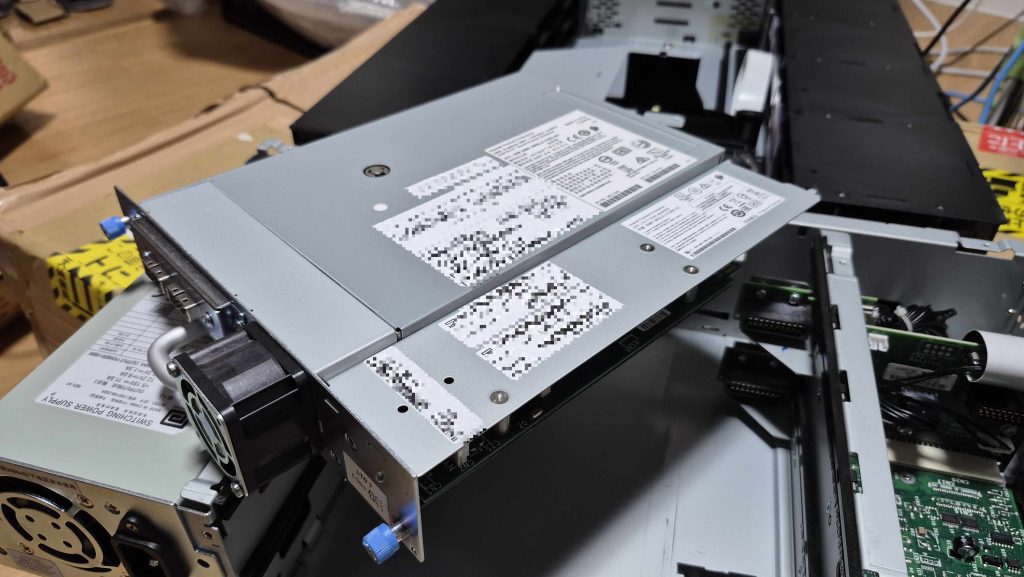
LTOを読み書きできるデバイスになります。
SASやFiberChanelなどの規格に対応しております。
画像はLTOテープライブラリ用ですが、もう少し幅が小さい5インチドライブ版などもある様です。
なお、メディアに世代があるように読み書きできる世代が決まっています。
今回はLTO7のドライブが搭載されています。
テープライブラリ/オートローダー
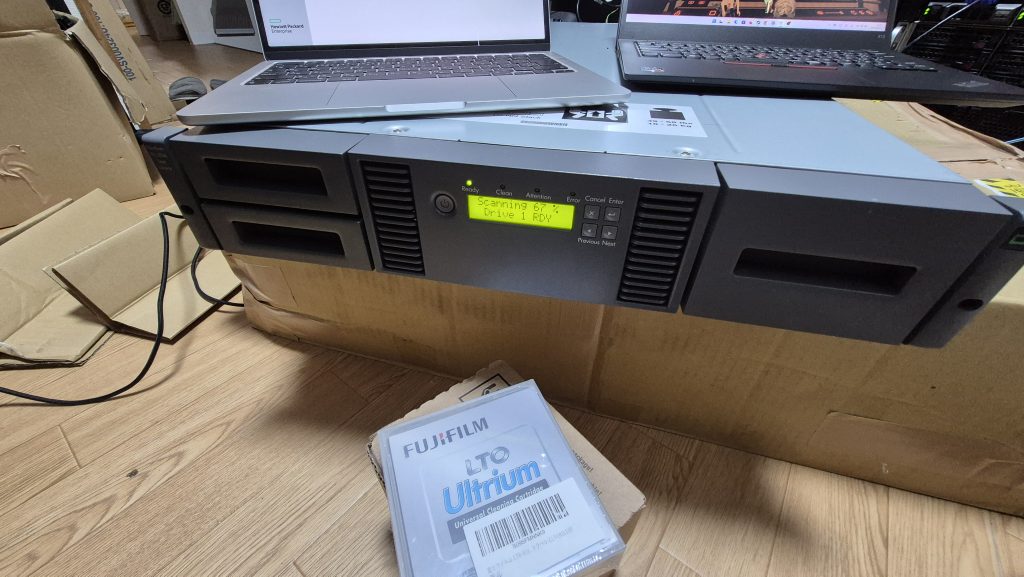
容量がなくなったテープを手動で入れ替えるのは効率的ではありません。なのでテープライブラリやオートローダーを用いて自動化します。
テープライブラリとオートローダーの違いは搭載できるドライブが1つだけならオートローダー、それ以上ならテープライブラリとなるらしいです。
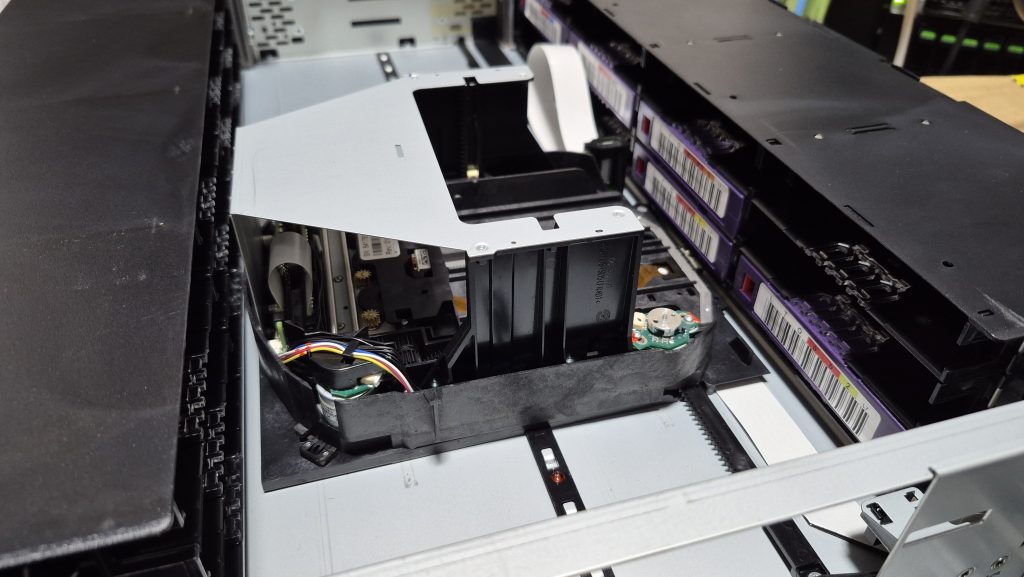
テープライブラリの中身は画像のようなメカが搭載しており、前後左右上下に動きます。また、メカの内部にバーコードリーダーが搭載されているため、メディアに貼り付けたバーコードを元にどのようなメディアが存在するのか、無いのかが分かります。
サーバー
LTOドライブに対して操作を行う必要がありますが、テープライブラリ自身には何もありません。(メディを入れ替えることはできてもデータの読み出しとかはできない)
なので適当なサーバーを用意します。
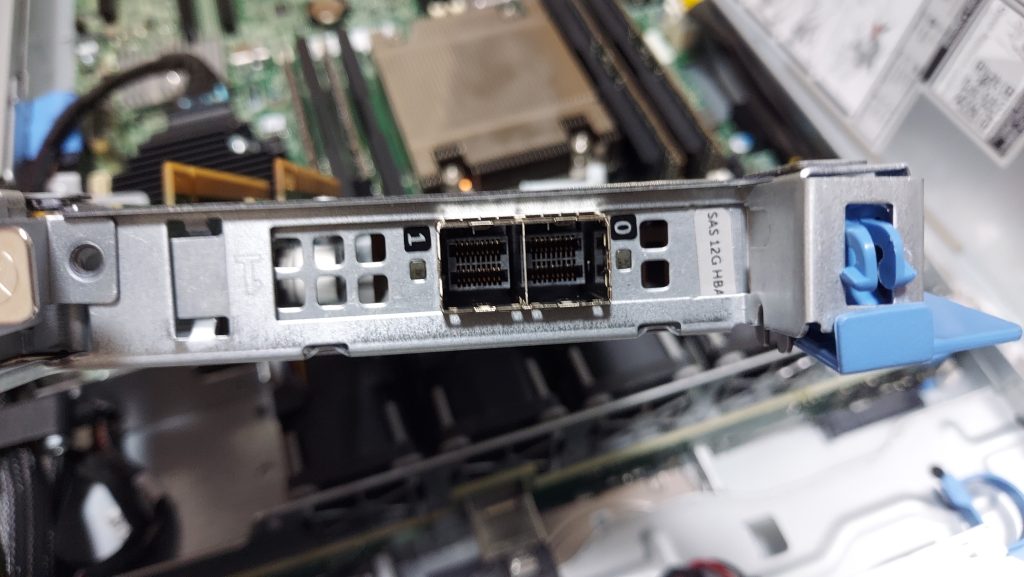
合わせてドライブに適合する拡張カードも用意しましょう。今回のドライブはSAS規格なのでSASのカードが元々付いていたDELL PowerEdge R430を使用しました。
LTOの動作確認
関連パッケージをインストールします。
sudo apt install -y lsscsi sg3-utils sg3-utils-udev mt-st mtx
デバイス名を探す
user@mamehinata:~$ lsscsi -g
[0:0:0:0] disk BUFFALO USB Flash Disk 1.00 /dev/sda /dev/sg0
[1:2:0:0] disk DELL PERC H730 Mini 4.30 /dev/sdb /dev/sg1
[2:0:0:0] tape HP Ultrium 7-SCSI N4Q1 /dev/st0 /dev/sg2
[2:0:0:1] mediumx HP MSL G3 Series 7.20 /dev/sch0 /dev/sg3
[12:0:0:0] cd/dvd HL-DT-ST DVD-ROM DTA0N D3C0 /dev/sr0 /dev/sg4
[N:0:1:1] disk KIOXIA-EXCERIA G2 SSD__1 /dev/nvme0n1 -
ここではtapeの/dev/sg2がLTOドライブで、mediumxの/dev/sg3がテープライブラリです。
ドライブ状態
mtコマンドを使ってドライブの状態を確認します。先ほど/dev/st0を確認しましたが、テープ自体の巻き戻しなしのnon-rewindの/dev/nst0を使います
# 何も刺さっていない状態
user@mamehinata:~sudo mt -f /dev/nst0 status
SCSI 2 tape drive:
File number=-1, block number=-1, partition=0.
Tape block size 0 bytes. Density code 0x0 (default).
Soft error count since last status=0
General status bits on (50000):
DR_OPEN IM_REP_EN
user@mamehinata:~$

# テープがある状態
user@mamehinata:~$ sudo mt -f /dev/nst0 status
SCSI 2 tape drive:
File number=0, block number=0, partition=0.
Tape block size 0 bytes. Density code 0x5c (LTO-7).
Soft error count since last status=0
General status bits on (41010000):
BOT ONLINE IM_REP_EN
テープライブラリの状態
今度はテープライブラリの状態を見てみます。
デバイス名は/dev/sg3でした
user@mamehinata:~$ sudo mtx -f /dev/sg3 status
Storage Changer /dev/sg3:1 Drives, 24 Slots ( 1 Import/Export )
Data Transfer Element 0:Empty
      Storage Element 1:Full :VolumeTag=LTO004L7
      Storage Element 2:Full :VolumeTag=LTO001L7
      Storage Element 3:Full :VolumeTag=LTO002L7
      Storage Element 4:Empty
      Storage Element 5:Empty
      Storage Element 6:Full :VolumeTag=LTO005L7
      Storage Element 7:Full :VolumeTag=LTO003L7
      Storage Element 8:Empty
      Storage Element 9:Empty
      Storage Element 10:Empty
      Storage Element 11:Empty
      Storage Element 12:Empty
      Storage Element 13:Empty
      Storage Element 14:Empty
      Storage Element 15:Empty
      Storage Element 16:Empty
      Storage Element 17:Empty
      Storage Element 18:Empty
      Storage Element 19:Empty
      Storage Element 20:Empty
      Storage Element 21:Empty
      Storage Element 22:Empty
      Storage Element 23:Empty
      Storage Element 24 IMPORT/EXPORT:Full :VolumeTag=CLNU01L1

# スロット2のテープをドライブ0にロード
user@mamehinata:~$ sudo mtx -f /dev/sg3 load 2 0
Loading media from Storage Element 2 into drive 0...done

user@mamehinata:~$sudo mtx -f /dev/sg3 status
  Storage Changer /dev/sg3:1 Drives, 24 Slots ( 1 Import/Export )
Data Transfer Element 0:Full (Storage Element 2 Loaded):VolumeTag = LTO001L7
      Storage Element 1:Full :VolumeTag=LTO004L7
      Storage Element 2:Empty
      Storage Element 3:Full :VolumeTag=LTO002L7
      Storage Element 4:Empty
      Storage Element 5:Empty
      Storage Element 6:Full :VolumeTag=LTO005L7
      Storage Element 7:Full :VolumeTag=LTO003L7
      Storage Element 8:Empty
      Storage Element 9:Empty
      Storage Element 10:Empty
      Storage Element 11:Empty
      Storage Element 12:Empty
      Storage Element 13:Empty
      Storage Element 14:Empty
      Storage Element 15:Empty
      Storage Element 16:Empty
      Storage Element 17:Empty
      Storage Element 18:Empty
      Storage Element 19:Empty
      Storage Element 20:Empty
      Storage Element 21:Empty
      Storage Element 22:Empty
      Storage Element 23:Empty
Storage Element 24 IMPORT/EXPORT:Full :VolumeTag=CLNU01L1
user@mamehinata:~$

# テープを取り出し
user@mamehinata:~$ sudo mtx -f /dev/sg3 unload 2 0
Unloading drive 0 into Storage Element 2...done
bareosを入れる
DB install
PostgreSQL18を入れます。
sudo apt install -y postgresql-common
sudo /usr/share/postgresql-common/pgdg/apt.postgresql.org.sh
sudo apt install postgresql-18
posgreqsqlの接続設定をpeerからパスワードに変更します

パスワードを設定します。
sudo su - postgres
psql
# posgresqlのシェル
\password
# パスワードの設定
\q
bareosを入れる
curl https://download.bareos.org/current/xUbuntu_24.04/add_bareos_repositories.sh | sudo sh -
sudo apt update
sudo apt install bareos
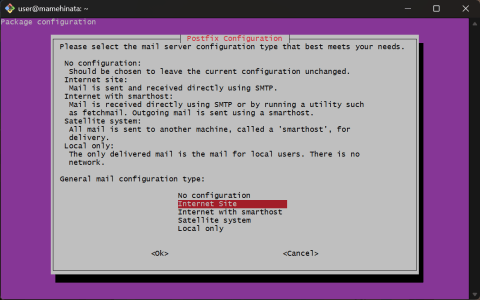
postfix(メールリレー)の設定要求されるのでNo Configuration
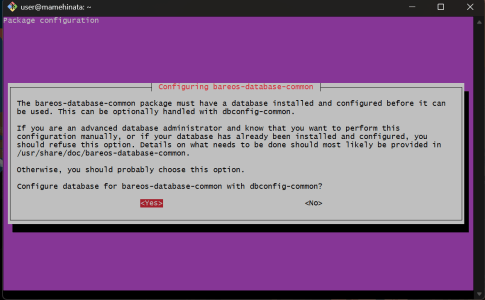
DBのセットアップをどうするのか聞かれるのでそのままYes
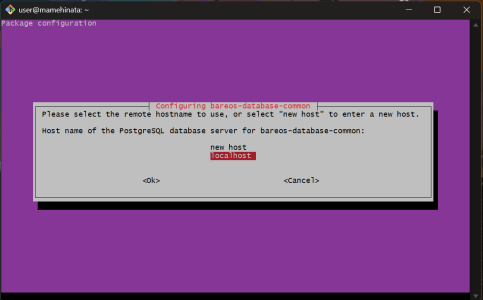
接続先のホスト設定を聞かれるのでlocalhost
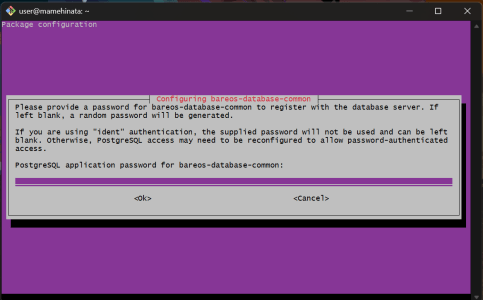
パスワードについて聞かれるので先ほど設定したパスワード
サービスを起動
sudo systemctl enable --now bareos-director.service
sudo systemctl enable --now bareos-storage.service
sudo systemctl enable --now bareos-filedaemon.service
これでCLIベースのコマンドが使えます
sudo bconsole
Webコンソールの準備
Webコンソールが使えると簡単にJob状況が分かる様になります。
Webダッシュボードは対象のbareosサーバーに繋がれば動くのでk8sで動かしました。
構築した時点では良さげなイメージがなかったので作成しました。

Dockerでもk8sでも動きます。
ユーザーとパスワードは以下のパスに配置してください。
/etc/bareos/bareos-dir.d/console/admin.conf
Console {
  Name = "admin"
  Password = "Passwor@d"
  Profile = webui-admin
  TlsEnable = false
}
バックアップ設定
必用なパッケージを追加します
sudo apt-get install -y bareos-storage-tape mtx lsscsi sg3-utils
デバイスを確認
user@mamehinata:~$ lsscsi -g
[0:0:0:0] disk BUFFALO USB Flash Disk 1.00 /dev/sda /dev/sg0
[1:2:0:0] disk DELL PERC H730 Mini 4.30 /dev/sdb /dev/sg1
[2:0:0:0] tape HP Ultrium 7-SCSI N4Q1 /dev/st0 /dev/sg2
[2:0:0:1] mediumx HP MSL G3 Series 7.20 /dev/sch0 /dev/sg3
[12:0:0:0] cd/dvd HL-DT-ST DVD-ROM DTA0N D3C0 /dev/sr0 /dev/sg4
[N:0:1:1] disk KIOXIA-EXCERIA G2 SSD__1 /dev/nvme0n1 -
テープドライブは/dev/sg2だが実際は/dev/nst0を使用
テープライブラリは/dev/sg3を使用
念のためbareosユーザーのグループを確認(tapeやdisk権限は無ければ付与する)
user@mamehinata:~$ id bareos
uid=113(bareos) gid=112(bareos) groups=112(bareos),6(disk),26(tape)
autochangerの設定を追加/etc/bareos/bareos-sd.d/autochanger/MSL2024.conf
Autochanger {
  Name = "MSL2024"
  Device = "LTO7-1"
  Changer Device = "/dev/sg3"
  Changer Command = "/usr/lib/bareos/scripts/mtx-changer %c %o %S 5a %d"
}
Deviceの設定を追加 /etc/bareos/bareos-sd.d/device/LTO7-1.conf
Device {
  Name = "LTO7-1"
  Media Type = "LTO7"
  Archive Device = "/dev/nst0"

  Device Type = "tape"
  Random Access = no
  RemovableMedia = yes

  Autochanger = yes
  AutomaticMount = no
  AlwaysOpen = no

  MaximumConcurrentJobs = 1
}
Directorの設定を追加 /etc/bareos/bareos-dir.d/storage/LTO7.conf
Storage {
  Name = "LTO7-SD"
  Address = "localhost" # sdのホストにあわせる(今回は同一)
  SDPort = 9103
  Password = "xxxxxxxxxxxxxxxxxxxxxxxx"

  Device = "MSL2024"  # SDのAutochangerの名前
  Media Type = "LTO7"
  Autochanger = yes
}
Poolの設定を追加 /etc/bareos/bareos-dir.d/pool/LTO7-Pool.conf
Pool {
  Name "LTO7Pool"
  Pool Tape = Backup
  Recycle = yes
  AutoPrune = yes
  Volume Retention = 7 days

  LabelFormat = "LTO7-"
  # テープあたりの書き込む容量
  Maximum Volume Bytes = 5880000000000

  # 実際のテープの巻き数
  MaximumVolumes = 5
  ScratchPool = "Scratch"
  RecyclePool = "Scratch"
}
テープラベルのスキャン
初期状態としてテープの状態をbareosのカタログとして記録します
sudo bconsole
*label barcod
sudo bconsole
*label barcodes
Automatically selected Storage: LTO7-SD
Connecting to Storage daemon LTO7-SD at localhost:9103 ...
3306 Issuing autochanger "list" command.
The following Volumes will be labeled:
Slot Volume
==============
1 LTO004L7
2 LTO001L7
3 LTO002L7
4 LTO003L7
6 LTO005L7
Do you want to label these Volumes? (yes|no): yes
Defined Pools:
1: Incremental
2: Full
3: Differential
4: Scratch
5: LTO7Pool
Select the Pool (1-5): 5
Connecting to Storage daemon LTO7-SD at localhost:9103 ...
Sending label command for Volume "LTO004L7" Slot 1 ...
3307 Issuing autochanger "unload slot 2, drive 0" command.
3304 Issuing autochanger "load slot 1, drive 0" command.
3305 Autochanger "load slot 1, drive 0", status is OK.
3920 Cannot label Volume because it is already labeled: "LTO004L7"
Label command failed for Volume LTO004L7.
Sending label command for Volume "LTO001L7" Slot 2 ...
3307 Issuing autochanger "unload slot 1, drive 0" command.
3304 Issuing autochanger "load slot 2, drive 0" command.
3305 Autochanger "load slot 2, drive 0", status is OK.
3920 Cannot label Volume because it is already labeled: "LTO001L7"
Label command failed for Volume LTO001L7.
Sending label command for Volume "LTO002L7" Slot 3 ...
3307 Issuing autochanger "unload slot 2, drive 0" command.
3304 Issuing autochanger "load slot 3, drive 0" command.
3305 Autochanger "load slot 3, drive 0", status is OK.
3920 Cannot label Volume because it is already labeled: "LTO002L7"
Label command failed for Volume LTO002L7.
Sending label command for Volume "LTO003L7" Slot 4 ...
3307 Issuing autochanger "unload slot 3, drive 0" command.
3304 Issuing autochanger "load slot 4, drive 0" command.
3305 Autochanger "load slot 4, drive 0", status is OK.
3920 Cannot label Volume because it is already labeled: "LTO003L7"
Label command failed for Volume LTO003L7.
Sending label command for Volume "LTO005L7" Slot 6 ...
3307 Issuing autochanger "unload slot 4, drive 0" command.
3304 Issuing autochanger "load slot 6, drive 0" command.
3305 Autochanger "load slot 6, drive 0", status is OK.
3920 Cannot label Volume because it is already labeled: "LTO005L7"
Label command failed for Volume LTO005L7.
*update slots
Automatically selected Storage: LTO7-SD
Connecting to Storage daemon LTO7-SD at localhost:9103 ...
3306 Issuing autochanger "list" command.
Volume "LTO004L7" not found in catalog. Slot=1 InChanger set to zero.
Volume "LTO001L7" not found in catalog. Slot=2 InChanger set to zero.
Volume "LTO002L7" not found in catalog. Slot=3 InChanger set to zero.
Volume "LTO003L7" not found in catalog. Slot=4 InChanger set to zero.
Volume "LTO005L7" not found in catalog. Slot=6 InChanger set to zero.
*status slots storage=LTO7-SD
Connecting to Storage daemon LTO7-SD at localhost:9103 ...
3306 Issuing autochanger "listall" command.
Slot | Volume Name | Status | Media Type | Pool |
------+------------------+-----------+----------------+--------------------------|
1*| LTO004L7 | ? | ? | ? |
2*| LTO001L7 | ? | ? | ? |
3*| LTO002L7 | ? | ? | ? |
4*| LTO003L7 | ? | ? | ? |
5*| ? | ? | ? | ? |
6*| LTO005L7 | ? | ? | ? |
7*| ? | ? | ? | ? |
8*| ? | ? | ? | ? |
9*| ? | ? | ? | ? |
10*| ? | ? | ? | ? |
11*| ? | ? | ? | ? |
12*| ? | ? | ? | ? |
13*| ? | ? | ? | ? |
14*| ? | ? | ? | ? |
15*| ? | ? | ? | ? |
16*| ? | ? | ? | ? |
17*| ? | ? | ? | ? |
18*| ? | ? | ? | ? |
19*| ? | ? | ? | ? |
20*| ? | ? | ? | ? |
21*| ? | ? | ? | ? |
22*| ? | ? | ? | ? |
23*| ? | ? | ? | ? |
24@| CLNU01L1 | ? | ? | ? |
ちなみに初期状態だとエラーが出ていましたが、クリニーングテープでドライブをクリーニングしたら解決しました。
ここまでで準備が一つ終わりました
これでこのサーバーにマウントしたディスクなどをバックアップすることができます
NASの設定
今回データソースはTruenas Scale(Dragonfish-24.04.2.5) のデータセットにします。
データを直接取り出すとデータ変更で差分が生まれて整合性が保てないので、スナップショットをバックアップする方向で進めます。
ユーザーの追加
NFSでマウントしたい際にアクセスができるようにユーザーを追加します
後のコマンド操作でsudoを使うのでsudoコマンドの許可とHomeディレクトリを設定しておきます。
bareosでスナップショットの保存
別の検証でNFS上から.zfsディレクトリを参照する予定でしたがNFSから.zfs以下のスナップショットを見ようとすると接続できない様です。
なのでZFSスナップショットを作成しますが、それを元にリードレプリカを作成し、読み取り専用で共有するとします。
手動でやるわけには行かないので自動で動かすスクリプトを作成します。
root@mamehinata:~# ./truenas_bareos_ro_clone.sh --truenas-host nas.server.z1n.in --truenas-user backup-user --src-dataset data1/samba1 --dst-dataset data1/bareos_ro/samba1 --dst-mountpoint /data1/bareos_ro/samba1 --export-path /mnt/data1/bareos_ro/samba1 --allowed-host 172.16.1.39 --mapall-user backup-user --mapall-group backup --local-mount /mnt/truenas-snap/samba1 --idmap-mode maproot
[1/5] local: unmount if mounted: /mnt/truenas-snap/samba1
[2/5] remote: recreate fixed snapshot: data1/samba1@bareos-last
(order: destroy DST clone -> destroy old fixed snapshot -> create fixed snapshot)
[3/5] remote: optional cleanup old snapshots on SRC (prefix=, keep=0)
[4/5] remote: ensure NFS share exists (midclt) path=/mnt/data1/bareos_ro/samba1 net=172.16.1.39/32 ro=true idmap=maproot
INFO: share exists for path; updating id=6
[5/5] local: mount NFS (ro) 172.16.1.39:/mnt/data1/bareos_ro/samba1 -> /mnt/truenas-snap/samba1
OK:
fixed snapshot: data1/samba1@bareos-last
clone dataset: data1/bareos_ro/samba1 (RO) from data1/samba1@bareos-last
export path: /mnt/data1/bareos_ro/samba1 (hosts=172.16.1.39)
mounted: /mnt/truenas-snap/samba1
root@mamehinata:~#
このようにコマンドを実行すると対象のサーバーにリモートでコマンドを実行してスナップショットの作成と共有を行います
コマンドを実行したマシンでストレージを確認して出てくればOKです。
root@mamehinata:~# sudo ls -la /mnt/truenas-snap/samba1/
total 14703397
drwxrwx--- 8 root root 14 Dec 30 09:38 .
drwxr-xr-x 3 root root 4096 Jan 14 14:19 ..
drwxrwx--- 15 user root 17 Nov 8 08:46 Backup
drwxrwx--- 10 user root 13 Mar 7 2025 Data
-rwxrwx--- 1 user root 2434 Nov 9 08:02 link.txt
バックアップの保守的に別ファイルとしてラッパースクリプト化します。
vim /usr/local/sbin/bareos-pre-nas-samba1.sh
#!/usr/bin/env bash
set -euo pipefail


exec /root/truenas_bareos_ro_clone.sh \
  --truenas-host 172.16.1.39 \
  --truenas-user backup-user \
  --src-dataset data1/samba1 \
  --dst-dataset data1/bareos_ro/samba1 \
  --dst-mountpoint /data1/bareos_ro/samba1 \
  --export-path /mnt/data1/bareos_ro/samba1 \
  --allowed-host 172.16.1.39 \
  --mapall-user backup-user \
  --mapall-group backup \
  --local-mount /mnt/truenas-snap/samba1 \
  --idmap-mode maproot
chmod 0750 /usr/local/sbin/bareos-pre-nas-samba1.sh
chown root:root /usr/local/sbin/bareos-pre-nas-samba1.sh
braeosユーザーで先ほど作成したファイルを実行できるようにsudoersに追加します
vim /etc/sudoers.d/bareos-nas-snap
bareos ALL=(root) NOPASSWD: /usr/local/sbin/bareos-pre-nas-samba1.sh
visudo -cf /etc/sudoers.d/bareos-nas-snap
parsed OKなら大丈夫
sudo -u bareos sudo /usr/local/sbin/bareos-pre-nas-samba1.sh
で実行できることを確認します
bareosのJob追加
Clientを追加します /etc/bareos/bareos-dir.d/client/nas-fd.conf
Client {
  Name = nas-fd
  Address = 127.0.0.1
  FDPort = 9102
  Password = "xxxxxxxxxxxxxxxxxxxxxxxxx"
  Catalog = MyCatalog
}
FieleSetも追加します /etc/bareos/bareos-dir.d/fileset/NasSamba1FS.conf
FileSet {
  Name = "NasSamba1FS"

  Include {
    Options {
      signature = MD5
      compression = GZIP
      onefs = yes
    }
   File = /mnt/truenas-snap/samba1
  }

  Exclude {
    File = /proc
    File = /sys
    File = /dev
    File = /run
    File = /var/tmp
    File = /var/cache
    File = /var/lib/bareos
  }
}
スケジュールを追加します /etc/bareos/bareos-dir.d/schedule/MonthlyFullWeeklyDiffDailyInc.conf
Schedule {
  Name = "MonthlyFullWeeklyDiffDailyInc"
  Run = Level=Full on 1 at 04:00
  Run = Level=Differential sat at 04:00
  Run = Level=Incremental sun-fri at 04:00
}
以下のスケジュールです
- 毎月第1日曜AM4時フルバックアップを実施
- 毎週土曜日のAM4時にフルバック以降の差分
- 日曜から金曜日まで毎日AM4時に差分
後ほどわかりますがフルバックアップに数日かかるため毎週とかするとテープ消費と実施時間が割に合わないのです。
またTZについては実行環境なので合わせて変更しておきます。

JobDefsを追加 /etc/bareos/bareos-dir.d/jobdefs/NasToLTO7-Defs.conf
JobDefs {
  Name = "NasToLTO7-Defs"
  Type = Backup
  Level = Incremental

  Accurate = yes

  Client = nas-fd
  FileSet = "NasSamba1FS"

  Storage = LTO7-SD
  Pool = LTO7Pool
  Schedule = "MonthlyFullWeeklyDiffDailyInc"

  Messages = Standard
  Priority = 10

  # テープはスプール推奨(スプール領域に余裕があるなら)
  Spool Data = no
  Spool Attributes = no

  # 復旧時に役立つ
  Write Bootstrap = "/var/lib/bareos/%c-%n.bsr"
}
スプールはターゲットのストレージのサイズを全部ローカルにコピーの上、テープに書き込みます。今回はストレージを確保できないのでNoです。
最後にJobを登録します /etc/bareos/bareos-dir.d/job/Backup-NasSamba1-To-LTO7.conf
Job {
  Name = "Backup-NasSamba1-To-LTO7"
  JobDefs = "NasToLTO7-Defs"

  RunScript {
    RunsWhen = Before
    RunsOnClient = yes
    Command = "/usr/bin/sudo /usr/local/sbin/bareos-apt-inhibit.sh lock %i"
  }
  RunScript {
    RunsWhen = Before
    RunsOnClient = yes
    FailJobOnError = yes
    Command = "/usr/bin/sudo /usr/local/sbin/bareos-pre-nas-samba1.sh"
  }

  RunScript {
    RunsWhen = After
    RunsOnSuccess = yes
    RunsOnFailure = yes
    RunsOnClient = yes
    Command = "/usr/bin/sudo /usr/local/sbin/bareos-apt-inhibit.sh unlock %i"
  }

  Description = "Backup /mnt/truenas-snap/samba1 to LTO-7 library"
}/usr/local/sbin/bareos-apt-inhibit.shはaptの自動アップデートでJobが殺されたので対策として一時的に止めてます。
コンフィグチェックして再起動します
sudo -u bareos bareos-dir -t
sudo systemctl restart bareos-dir
バックアップの設定ができているので
安定化のための設定変更
設定中FD数問題が当たったように見えたたため設定変更します
sudo systemctl edit bareos-fd
sudo systemctl edit bareos-dir
#
[Service]
LimitNOFILE=524288
sudo systemctl daemon-reload
systemctl restart bareos-fd
ここまでやってようやくバックアップJobが走るようになります。

約28TBを5巻きで大体6日と7時間かかりました。
大体56.6MB/s程度でファイルとして記録しているならその程度とのこと
レストア
今回は面倒くさかったのでwebダッシュボードから操作します。
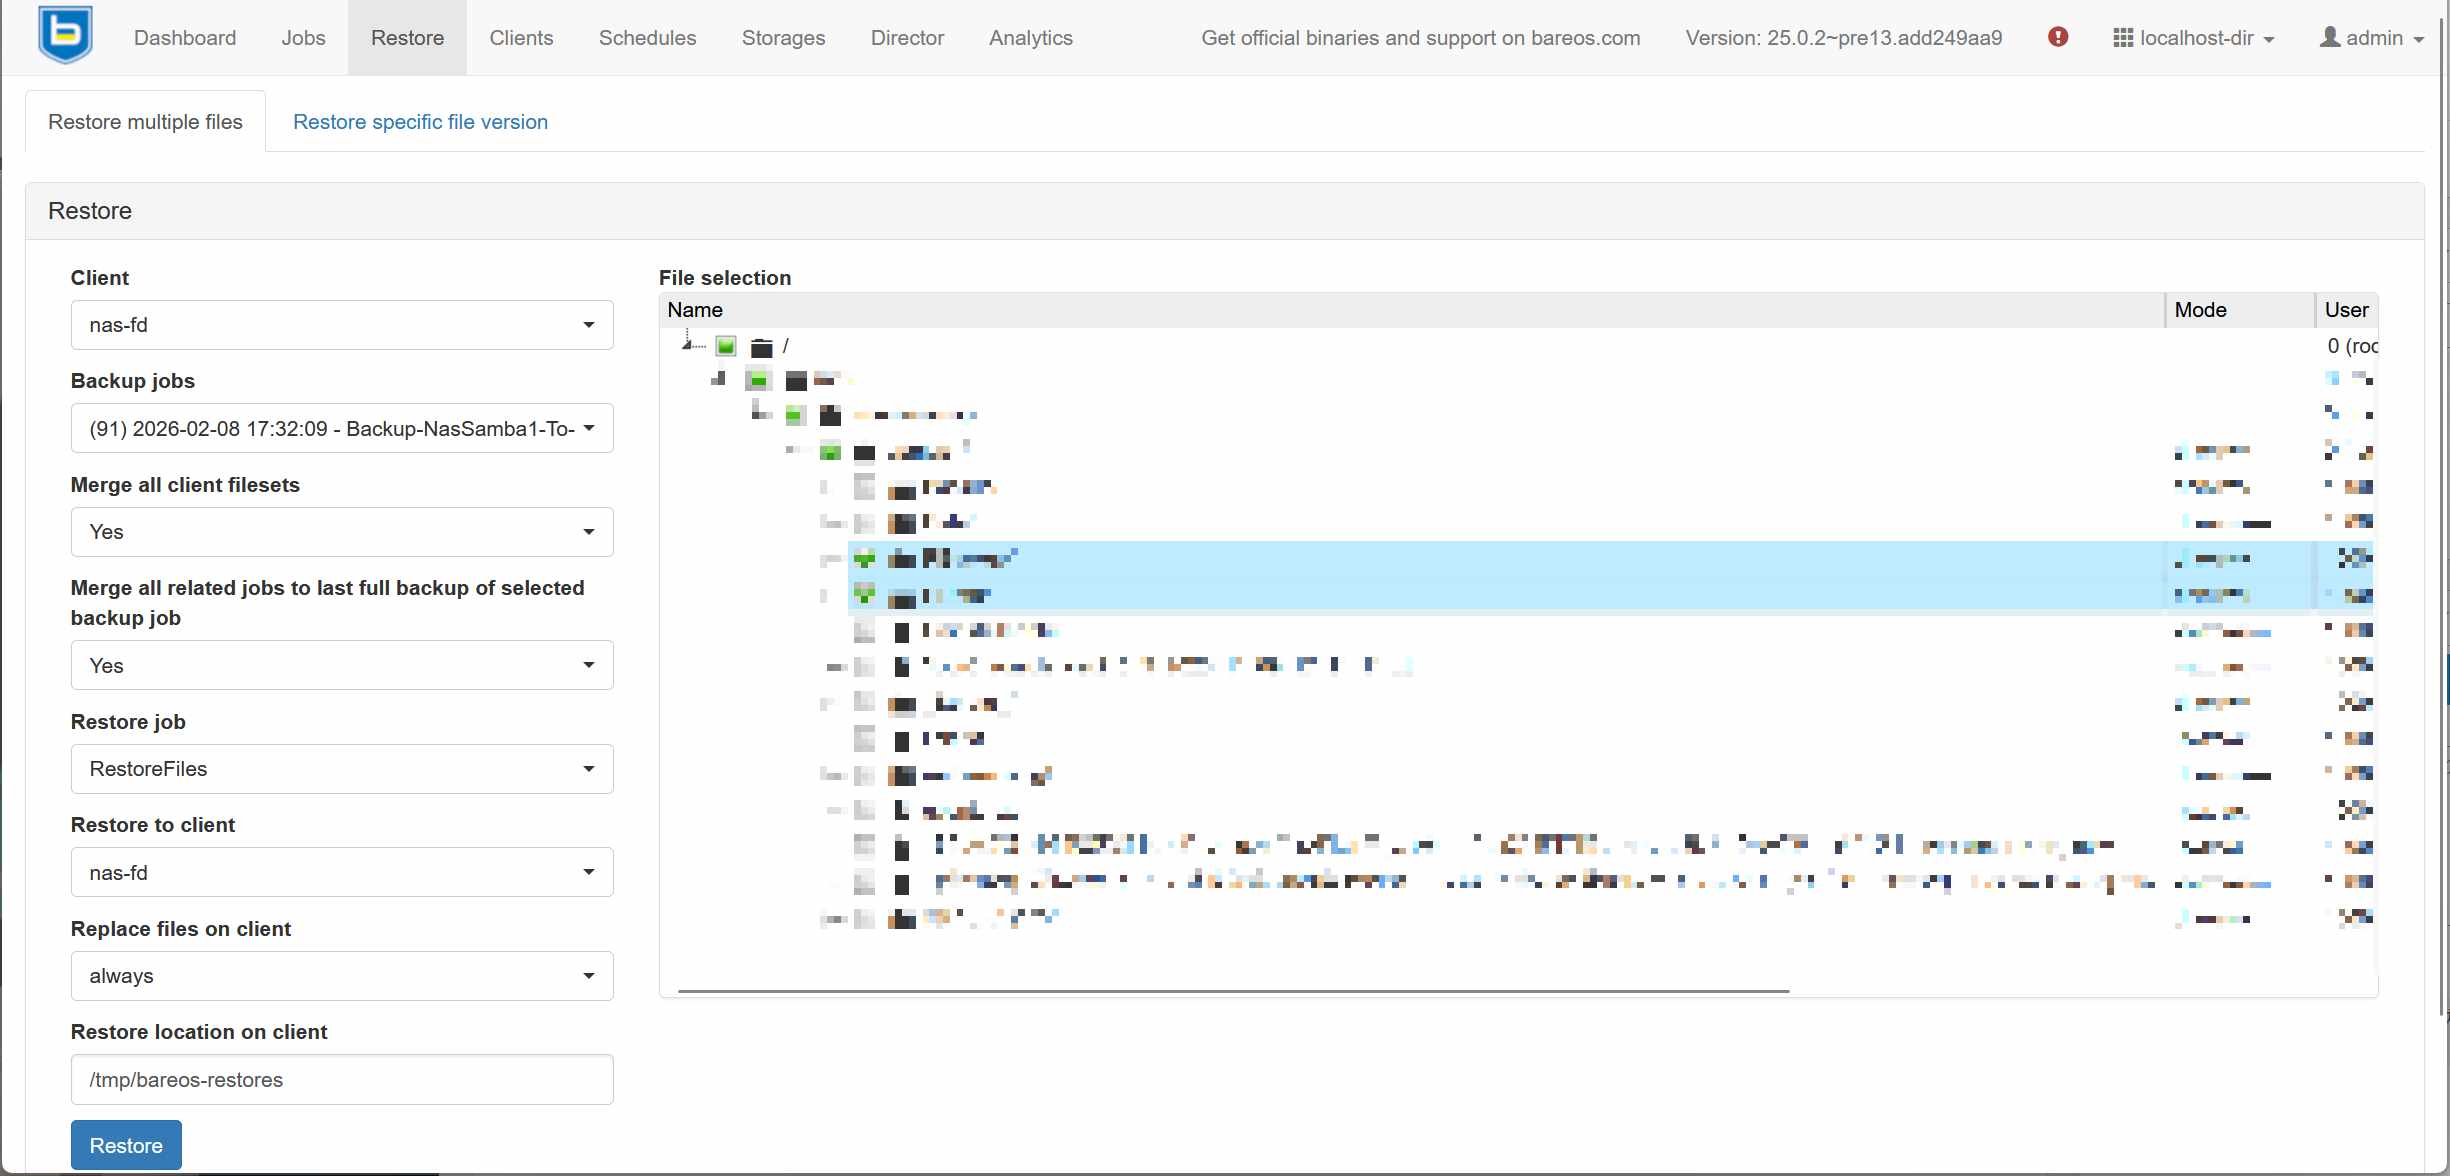
RestoreからClientとBackupJobsを選べば右にファイル群が出てくるので対象ファイルを選択します。
下部のRestore local on clientにファイルが復元されるので適切なパスを指定します。
あとは時間が解決してくれます。
参考


コメント