今回はディスプレイ一つ目
OLEDディスプレイと液晶


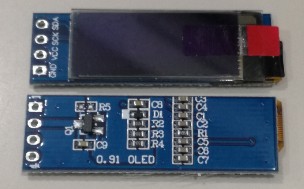
AliexpressやAmazonで売っている液晶モジュールです
左と中央がI2Cで接続できる単色OLEDモジュールと、右がSPI接続の液晶とSDカードスロットです
OLEDモジュールは大きさが異なりますがどちらも同じOLEDモジュール+ICのSSD1306とIFを固定する基板で構成されています(今回はI2CモデルですがSPIモデルもある様子)
今回はこのOLEDモジュールをRustで動かすサンプルコードを書いてみます
I2Cスキャン
CやMicroPythonでの資料は多いのですがRust版のI2Cスキャンが無かったのでAIを叩きながら作りました

プローブが繋がっているのが前提ですが他に接続せずスキャンできます。

(このソース作成時は4つのデバイスを繋いでますが)この3CがOLEDモジュールです
ちなみに中央のOLEDは裏の抵抗を置き換える事でアドレスを変えることができますが、左のOLEDは変更できないので注意が必要です
接続


先ほどの説明の通りI2Cのアドレスが被ってしまっているので、系等を分けています。
RaspberryPiPicoは2系統i2CがあるのでGPIO16,17とGPIO18,19を使用しています。
ソースコード
#![no_std]
#![no_main]

use defmt::*;
use defmt_rtt as _;
use embedded_hal::delay::DelayNs;
use panic_probe as _;
use rp2040_hal::{self as hal, fugit::RateExtU32};

use hal::pac;
use embedded_graphics::{
    mono_font::{ascii::FONT_6X10, MonoTextStyleBuilder},
    pixelcolor::BinaryColor,
    prelude::*,
    text::{Baseline, Text},
    primitives::{PrimitiveStyleBuilder, Rectangle, Triangle, Circle},
};
use ssd1306::{prelude::*, I2CDisplayInterface, Ssd1306};


#[link_section = ".boot2"]
#[used]
pub static BOOT2: [u8; 256] = rp2040_boot2::BOOT_LOADER_GENERIC_03H;

const XTAL_FREQ_HZ: u32 = 12_000_000u32;


#[rp2040_hal::entry]
fn main() -> ! {
    info!("Program start!");
    let mut pac = pac::Peripherals::take().unwrap();

    let mut watchdog = hal::Watchdog::new(pac.WATCHDOG);

    let clocks = hal::clocks::init_clocks_and_plls(
        XTAL_FREQ_HZ,
        pac.XOSC,
        pac.CLOCKS,
        pac.PLL_SYS,
        pac.PLL_USB,
        &mut pac.RESETS,
        &mut watchdog,
    )
    .ok()
    .unwrap();

    let mut timer = rp2040_hal::Timer::new(pac.TIMER, &mut pac.RESETS, &clocks);

    let sio = hal::Sio::new(pac.SIO);

    let pins = hal::gpio::Pins::new(
        pac.IO_BANK0,
        pac.PADS_BANK0,
        sio.gpio_bank0,
        &mut pac.RESETS,
    );


    let sda_pin_a = pins.gpio16.into_pull_up_input().into_function::<hal::gpio::FunctionI2C>();
    let scl_pin_a = pins.gpio17.into_pull_up_input().into_function::<hal::gpio::FunctionI2C>();

    let sda_pin_b = pins.gpio18.into_pull_up_input().into_function::<hal::gpio::FunctionI2C>();
    let scl_pin_b = pins.gpio19.into_pull_up_input().into_function::<hal::gpio::FunctionI2C>();

    // I2C0 の初期化(400kHz)
    let i2c0 = hal::I2C::i2c0(
        pac.I2C0,
        sda_pin_a,
        scl_pin_a,
        400u32.kHz(),
        &mut pac.RESETS,
        &clocks.system_clock,
    );

    // 0x3C アドレスのデバイスに接続
    let interface_a = I2CDisplayInterface::new_custom_address(i2c0, 0x3Cu8);
    let mut display_a = Ssd1306::new(
        interface_a,
        DisplaySize128x64,
        DisplayRotation::Rotate0,
    ).into_buffered_graphics_mode();
    display_a.init().unwrap();

    // I2C1の初期化
    let i2c1 = hal::I2C::i2c1(
        pac.I2C1,
        sda_pin_b,
        scl_pin_b,
        400u32.kHz(),
        &mut pac.RESETS,
        &clocks.system_clock,
    );
    let interface_b = I2CDisplayInterface::new(i2c1);
    let mut display_b = Ssd1306::new(
        interface_b,
        DisplaySize128x32,
        DisplayRotation::Rotate0,
    ).into_buffered_graphics_mode();
    display_b.init().unwrap();

    let yoffset = 8;

    let style = PrimitiveStyleBuilder::new()
        .stroke_width(1)
        .stroke_color(BinaryColor::On)
        .build();

    let text_style = MonoTextStyleBuilder::new()
        .font(&FONT_6X10)
        .text_color(BinaryColor::On)
        .build();


    // display A
    Text::with_baseline("Hello world!", Point::new(0, 32), text_style, Baseline::Top)
        .draw(&mut display_a)
        .unwrap();

    Text::with_baseline("Hello Rust!", Point::new(0, 40), text_style, Baseline::Top)
        .draw(&mut display_a)
        .unwrap();

    Text::with_baseline("zinntikumugai.com", Point::new(0, 48), text_style, Baseline::Top)
        .draw(&mut display_a)
        .unwrap();

    // screen outline
    // default display size is 128x64 if you don't pass a _DisplaySize_
    // enum to the _Builder_ struct
    Rectangle::new(Point::new(0, 0), Size::new(127, 31))
        .into_styled(style)
        .draw(&mut display_a)
        .unwrap();

    // triangle
    Triangle::new(
        Point::new(16, 16 + yoffset),
        Point::new(16 + 16, 16 + yoffset),
        Point::new(16 + 8, yoffset),
    )
    .into_styled(style)
    .draw(&mut display_a)
    .unwrap();

    // square
    Rectangle::new(Point::new(52, yoffset), Size::new_equal(16))
        .into_styled(style)
        .draw(&mut display_a)
        .unwrap();

    // circle
    Circle::new(Point::new(88, yoffset), 16)
        .into_styled(style)
        .draw(&mut display_a)
        .unwrap();

    //

    display_a.flush().unwrap();

    // Display b
    Text::with_baseline("Hello world!", Point::new(0, 32), text_style, Baseline::Top)
        .draw(&mut display_b)
        .unwrap();

    Text::with_baseline("Hello Rust!", Point::new(0, 40), text_style, Baseline::Top)
        .draw(&mut display_b)
        .unwrap();

    // screen outline
    // default display size is 128x64 if you don't pass a _DisplaySize_
    // enum to the _Builder_ struct
    Rectangle::new(Point::new(0, 0), Size::new(127, 31))
        .into_styled(style)
        .draw(&mut display_b)
        .unwrap();

    // triangle
    Triangle::new(
        Point::new(16, 16 + yoffset),
        Point::new(16 + 16, 16 + yoffset),
        Point::new(16 + 8, yoffset),
    )
    .into_styled(style)
    .draw(&mut display_b)
    .unwrap();

    // square
    Rectangle::new(Point::new(52, yoffset), Size::new_equal(16))
        .into_styled(style)
        .draw(&mut display_b)
        .unwrap();

    // circle
    Circle::new(Point::new(88, yoffset), 16)
        .into_styled(style)
        .draw(&mut display_b)
        .unwrap();

    //

    display_b.flush().unwrap();


    timer.delay_ms(5000);

    loop {
        for i in 1u8..254 {

            display_b.set_brightness(Brightness::custom(1u8, i)).unwrap();
            timer.delay_ms(100);
        }
        timer.delay_ms(2000);

    }
}
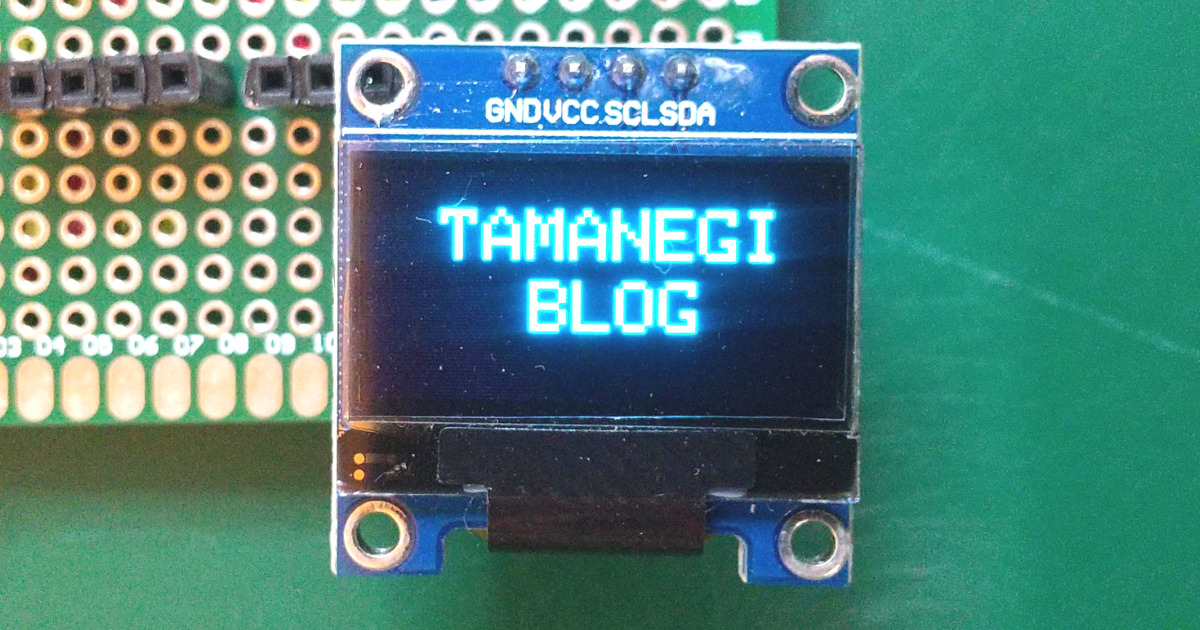
二つのOLEDディスプレイそれぞれに図形とテキストを描画しています。
右のOLEDはフルサイズのため図形とテキストを描画できますが、左のOLEDはハーフサイズのため切り取られて描画されます。

ディスプレイの設定でDisplaySize128x32とありますが、DisplaySize128x64とすると液晶のサイズを128×64として半分のビット数で描画するため文字が潰れます。
左のOLED、大きさに対して画面の縦方向が若干見かけに対して内側にあるようで、文字を描画できそうな隙間がありますができませんでした。
このままではつまらないので一応コントラスト比の変更をしてみました。
いつも通りGitHubはこちら

参考


コメント